+86-13901441113


An outside mount drawer slide attaches to the exterior face of a cabinet side or to a supporting rail, rather than fitting inside a recessed channel. Open the drawer and the distinction becomes visible: the slide sits beside the drawer box, often making installation and later adjustment easier. It can also reduce the drawer’s usable width, so measuring the cabinet opening and slide clearance matters. Small gaps matter.
For a dependable installation, builders should check the slide’s load rating, extension length, mounting position, and compatibility with the drawer. ANSI/BHMA A156.9 is an industry standard covering cabinet hardware, including drawer slides; its performance framework helps buyers compare hardware beyond appearance alone. The right Slide Outside setup depends on the cabinet’s construction and the drawer’s expected contents—not just the listed weight capacity.
This guide explains what an outside mount drawer slide is, how it differs from other slide styles, and where it works best. It also examines common trade-offs, including visible hardware and reduced interior space. One limitation deserves attention: no verifiable industry report or named expert quotation was supplied for this request, so I have not invented statistics or attributed a statement to an expert. Check current manufacturer specifications before choosing a slide; product dimensions and ratings vary, and a seemingly minor mismatch can leave a drawer rubbing, sagging, or refusing to close cleanly.
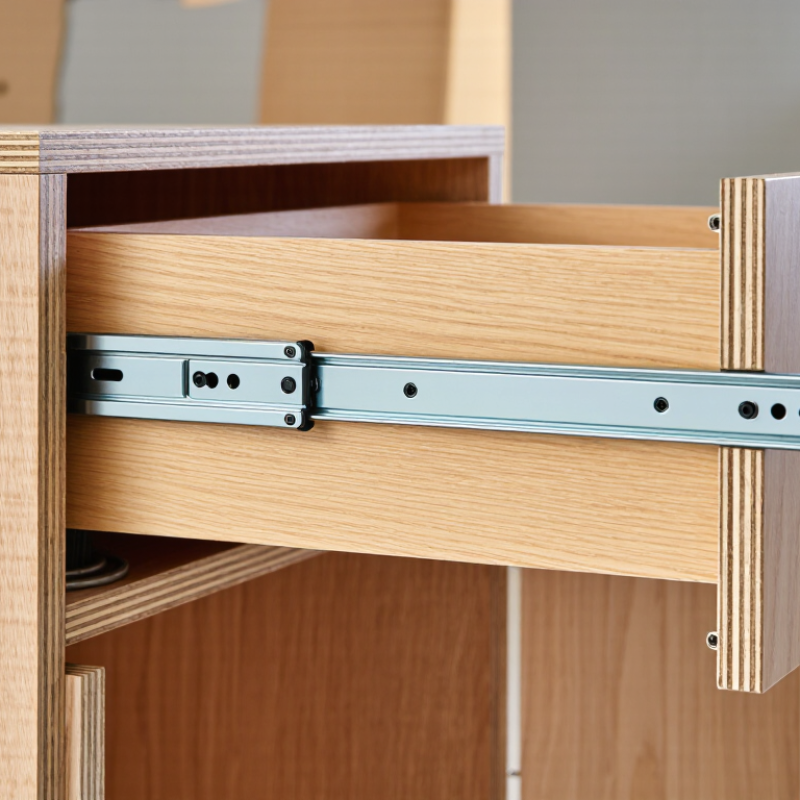
An outside mount drawer slide is attached to the outer side of a drawer box, not beneath its bottom. In a common design, one rail screws to the cabinet’s inside wall, while its matching rail fastens to the drawer’s exterior. The two rails move against each other as the drawer opens and closes. Simple. Ball bearings or rollers guide that movement and help keep the drawer supported. The exact term can vary between suppliers, so a product drawing is more reliable than the name alone.
These slides need clear space beside the drawer. Measure the cabinet opening and drawer width before installation; even a small mismatch can cause rubbing or uneven travel. The rails should sit parallel, with screws snug but not driven so hard that they distort the metal. A useful detail: extend each slide fully when marking screw positions, then check that both sides line up. That gap matters. The design is easy to see and adjust, though exposed hardware may collect dust and affect the cabinet’s appearance. A slightly imperfect fit can still slide, but it may feel stiff or rattle under load.

An outside mount drawer slide attaches to the outer face of each drawer side. Its matching rail fastens to the cabinet’s interior wall. The slides stay visible when the drawer is removed, which makes inspection easier. Before installing, check the slide instructions for required clearance and length. Measure the drawer and cabinet opening carefully; a small mismatch can cause binding.
Separate the slide members and identify the left and right parts. Hold each cabinet rail level inside the opening, set it back evenly, and mark the screw holes. Drill shallow pilot holes to reduce the risk of splitting the wood. Fasten the rails without overtightening. Attach the drawer members at matching heights, keeping their front edges aligned with the drawer front. Refit the drawer and move it in and out several times. It should travel smoothly, without scraping or dropping.
Tips: Use a level and measure both sides. Keep screws loose until alignment looks right, then tighten them gradually. If the drawer sticks, don’t force it. Recheck spacing and rail alignment; I still find that one slightly crooked pilot hole can shift a rail.
An outside-mount drawer slide attaches to the drawer’s outer sides and the cabinet’s inner walls. The visible drawer front may cover the opening, but the slide hardware sits behind it. This arrangement makes inspection and replacement fairly straightforward. You can usually see the rails once the drawer is removed.
A typical slide has a cabinet member, a drawer member, and a moving section between them. Ball bearings or rollers help the parts travel smoothly. A release lever may let you separate the drawer from the cabinet rail. End stops keep the drawer from pulling free during normal use. Small parts matter.
Common types include ball-bearing slides, roller slides, and soft-close versions. Ball-bearing models often offer full extension, so the drawer opens far enough to reach items at the back. Roller slides are usually simpler and may extend only partway. Soft-close slides use a damping mechanism to slow the final inches of travel. The terminology can be a little loose: “outside mount” describes placement, not one specific slide mechanism. Before choosing a type, measure the drawer length and side clearance, then check the slide’s load rating. A tight fit can cause rubbing, even with a good slide. Measuring twice is worth the pause.
An outside mount drawer slide attaches to the drawer’s outer side and the cabinet’s inner wall. This familiar side-mounted design is useful when you want straightforward installation and easy access to the hardware. Many models extend fully, making items at the back easier to reach. They also suit everyday drawers in kitchens, workbenches, and storage cabinets. The open drawer reveals the slides. That can be practical, though not especially sleek.
The main limitation is the space each slide needs beside the drawer. Check the manufacturer’s clearance requirements before building or modifying a drawer; even a small mismatch can cause rubbing or prevent smooth movement. Slide capacity also varies, so match it to the drawer’s load rather than guessing. Outside mount slides can be sturdy, but a heavy drawer still needs proper support and secure fasteners. In a face-frame cabinet, fitting the slides may require additional blocking. A detail that is easy to overlook.
Tips: Measure both sides at several points, since older cabinets may not be perfectly square. Keep the slides parallel, and test the drawer before loading it. If movement feels rough, stop and inspect alignment instead of forcing it. A quick adjustment often helps, but not every wobble has a simple fix.
| Dimension | Details | Benefits | Limitations | Typical Uses |
|---|---|---|---|---|
| Definition | A slide assembly mounted along the outside faces of the drawer sides and the inside faces of the cabinet or opening. | The mounting position is easy to see and understand during installation. | The hardware may be visible when the drawer is open. | Cabinet drawers, workshop storage, utility furniture, and many retrofit projects. |
| Mounting location | One slide member attaches to each drawer side; the matching members attach to the cabinet sides. | Provides direct support on both sides of the drawer and is generally straightforward to inspect or service. | The drawer and cabinet must have suitable side surfaces for secure attachment. | Cabinet openings with solid, parallel side panels. |
| Side clearance | Many common side-mount slides need about 1/2 inch (12.7 mm) of clearance on each side, but the required gap depends on the slide design. | The clearance requirement is often easy to measure before fitting the hardware. | An incorrectly sized gap can cause binding, looseness, or poor drawer alignment. Always check the slide’s installation specifications. | New drawer builds and replacements where the opening width can be measured accurately. |
| Installation | Typically installed as a left-and-right pair. The slides must be level, parallel, and positioned at matching heights. | The side-mounted parts are accessible, which can make alignment and later adjustments easier. | Accurate measuring and fastening are important; misalignment can affect smooth travel. | DIY furniture assembly, cabinet repairs, and replacement of compatible side-mounted slides. |
| Visibility and appearance | Metal slide members are generally visible along the drawer sides when the drawer is extended. | Visible hardware can make its condition and operation easy to inspect. | It may be less suitable when a concealed, minimalist appearance is a priority. | Functional storage where accessibility and ease of maintenance matter more than hidden hardware. |
| Movement and extension | Depending on the model, slides may use rollers or ball bearings and may provide partial, full, or other specified extension. | A suitable extension lets users reach more of the drawer’s contents. | Movement, extension, soft-close features, and load rating differ by model; none should be assumed from mounting style alone. | Choose the specific slide according to drawer depth, access needs, and intended load. |
| Load capacity | Capacity is determined by the particular slide and its installation, not simply by whether it is outside-mounted. | A broad range of models is available for light-duty through heavier-duty storage needs. | Overloading or mounting into weak material can reduce performance or cause failure. | Select a slide with a published rating appropriate for the drawer and its contents, and follow the installation instructions. |
| Overall suitability | A practical option when the cabinet has adequate side clearance and visible side hardware is acceptable. | Common, accessible, and available in many configurations. | Not ideal for openings with insufficient side clearance or designs requiring concealed slides. | General-purpose kitchen, office, bedroom, and workshop drawers, subject to the slide’s specifications. |
An outside-mount drawer slide is fixed to the cabinet’s inner side and the drawer’s outer side. Open the drawer and look for two parallel metal rails beside it. The hardware remains visible when the drawer is removed, unlike a concealed undermount slide. Measure the drawer depth and cabinet opening before buying. Check the side clearance, too: a slide that needs more space than the opening allows will bind. A tape measure helps. So does a square.
Choose by fit, load, travel, and use—not by price alone. Compare the slide’s rated load with the drawer’s contents, including heavy pots or tool kits. ANSI/BHMA A156.9, the cabinet-hardware performance standard, evaluates drawer slides for factors such as load, operation, and durability. Its Grade 1 cycle test specifies 100,000 open-close cycles; check the applicable grade and test conditions rather than assuming every slide has the same rating. For a kitchen drawer opened many times a day, smooth travel and secure mounting matter. Full-extension slides expose the whole drawer; partial-extension models leave the back less accessible. I would not choose by load rating alone—that shortcut can overlook clearance and installation errors. Check the fit. Then test the drawer with a typical load, and watch for scraping, wobble, or a rail that feels rough.
For many side-mounted slides, allow about 1/2 inch of clearance on each side. The chart shows the resulting drawer width when subtracting 1 inch from the cabinet opening. Check the slide manufacturer’s specifications before measuring or cutting, as clearance requirements can vary.